Love this scary little guy! How about you?
Thursday, October 6, 2011
Frankenstein! ~My Favorite Monster~
Here are a few cards I made using files from SVGCuts and Punkin' Patch stamps. The svg files are Monster Mash SVG Collection and Salazar's Scary Squares SVG Collection. The stamp is from the Trick or Treat set from Punkin' Patch Stamps.
The card is pretty simple, but fun I think! I added lots of inking for highlights, silver brads for his "bolts", and a cute little ripped sign displaying the sentiment. There is orange craft wire wrapped around the part that is torn back.
Love this scary little guy! How about you?
Wednesday, October 5, 2011
Snowman Card
I have always loved this card! I made a ton of cards like this a long, long time ago....LOL... The original design came from a Stampin' Up! catalog and I used the stamp set from them to make the cards. Well, I thought of recreating the same card using files from SVGCuts!
The snowman "parts" are from the Christmas Cookie Party SVG Collection. (I made the arms longer by just cutting with scissors)
The sentiment is just hand-written using a white gel pen. The background snowflakes are stamped using white ink. They actually have glitter on them too, but it's not noticeable in the pictures. I inked the edges of the snowman parts and added some white highlights to them as well. The white frame is just made in SCAL using rectangle shapes and the "snow" is hand cut **GASP!** using scissors and then inked edges in blue.
Sorry the pictures are kinda crummy...I am still trying to get the whole photography thing down...it's hard!! Sometimes I get it, sometimes I don't...oh well. :) Let me know how you like the card! Try it out...it is so simple!!!
The snowman "parts" are from the Christmas Cookie Party SVG Collection. (I made the arms longer by just cutting with scissors)
The sentiment is just hand-written using a white gel pen. The background snowflakes are stamped using white ink. They actually have glitter on them too, but it's not noticeable in the pictures. I inked the edges of the snowman parts and added some white highlights to them as well. The white frame is just made in SCAL using rectangle shapes and the "snow" is hand cut **GASP!** using scissors and then inked edges in blue.
Sorry the pictures are kinda crummy...I am still trying to get the whole photography thing down...it's hard!! Sometimes I get it, sometimes I don't...oh well. :) Let me know how you like the card! Try it out...it is so simple!!!
Witch Hat Decoration
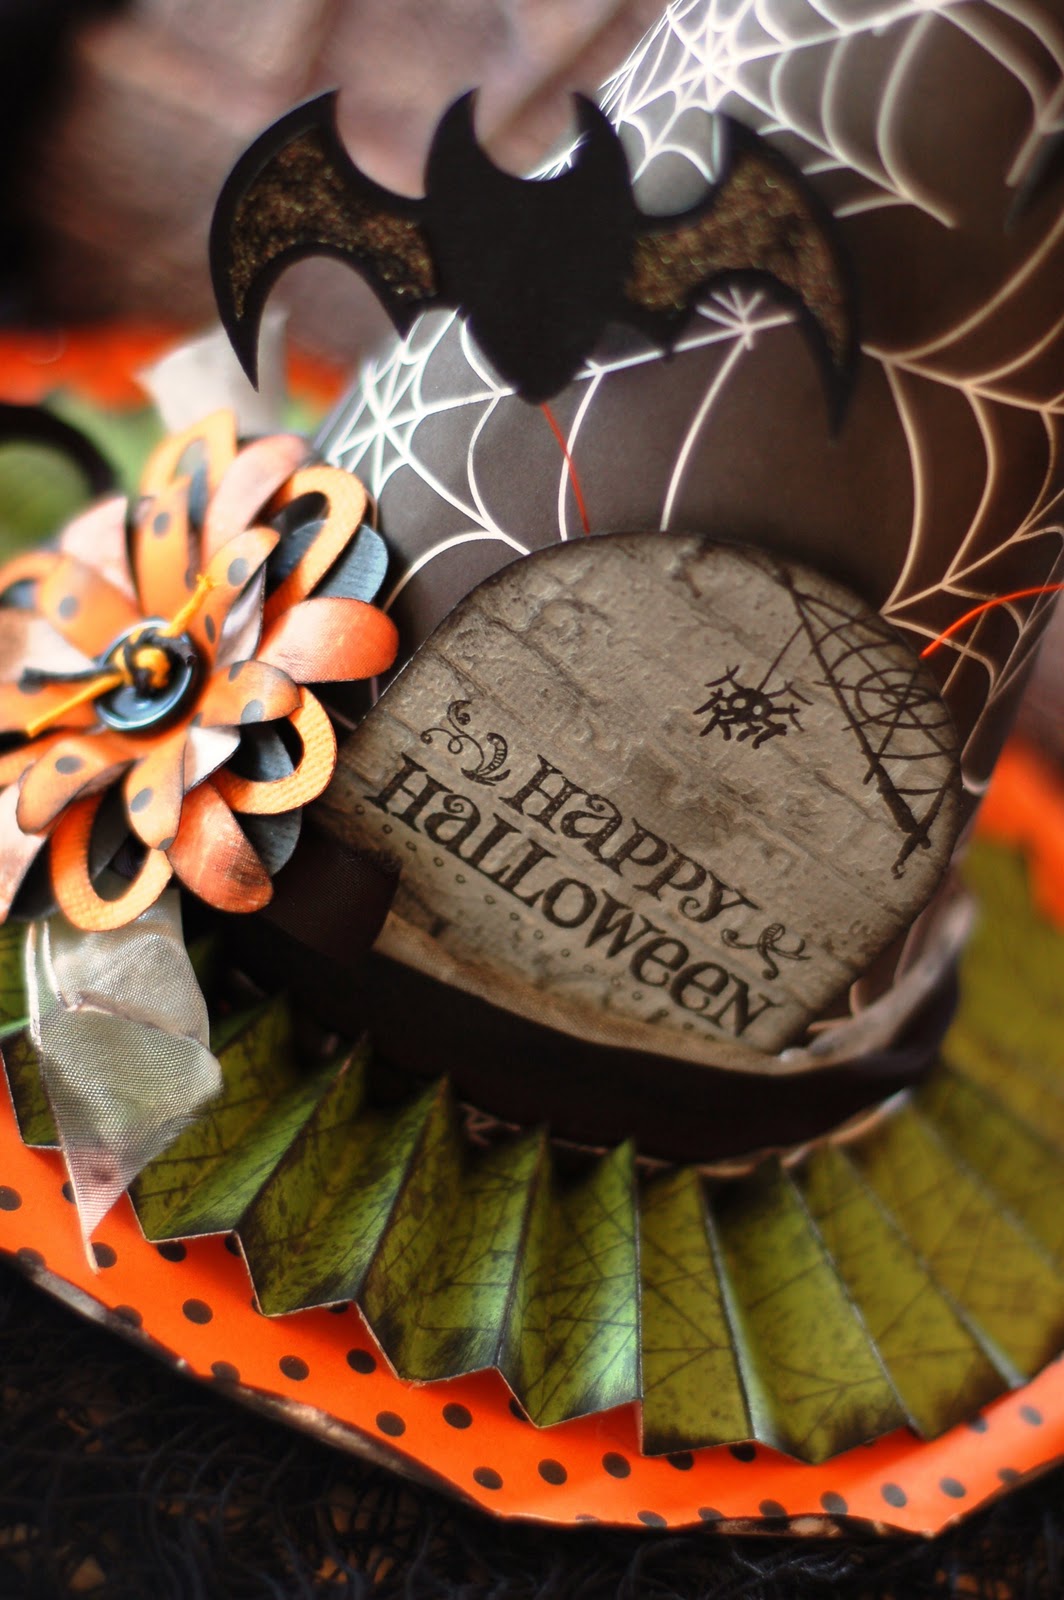
I was so inspired to make a Witch Hat to add to my Halloween decorations!
I think it turned out so cute! The top (pointy) part is just one piece of 12x12 paper and trimmed just a bit at the bottom. I didn't use a cardboard cone shape inside, I just twisted the paper until I got the shape I wanted and it came out great and pretty sturdy.
The flower, bats and headstone came from SVGCuts from the Elmhurst Hollow SVG Kit. The stamped sentiment and spider web came from Punkin' Patch Stamps (The Witching Hour & Trick or Treat).
The headstone is embossed using a cuttlebug folder (stamped first!). Lots of black inking on the edges...I love to ink! I just used some ribbon I had laying around. Actually the black "ribbon" is material that I just ripped to make a long strip. It didn't matter if it was frayed since I wanted it to look creepy. To the white ribbon, I inked that too with black ink and added greenish/black glitter to the bats. Came out pretty cute..I think I may need to make some more!
Tuesday, October 4, 2011
A ~not so scary~ Coffin Box
Love, LOVE these coffin boxes from SVGCuts! They come from the Elmhurst Hollow SVG Kit.....A MUST HAVE KIT!! The stamps came from Punkin Patch Stamps. The "cat" is from The Witching Hour and the "Boo" is from Trick or Treat. The background stamp is from my own collection and punched out from a punch from Stampin' Up. Great boxes to put some Halloween goodies in!
On a side note, my mom puts up a minature Halloween Village every year, and she asked me to make tiny coffins to add to her village. I wasn't sure how tiny I could go, but tried it anyway. I sized them at 2.5", and they came out perfect!! They were so cute!! I will add a picture of them later in her village.
Panda Bear Card
It's been a long, long time, but I used a Cricut cartridge today! I used the Pagoda...such cute things on it! So I made this Panda card. Simple and easy. The flower is a punch that I have and I just put a tiny brad through the middle and then I stamped the "Thanks" sentiment. Easy!
Thanks A Latte Card
Another "Thank You" card for my card swap! I didn't do anything to the original design, stayed simple, since I had to make 5 identical cards for the swap. (The design is from My Scrap Chick) The design is simple, but it wasn't so simple cutting out the letters! I added the coffee bens and the steam from a stamp set I have. I also wrote the words "latte" on the cup using a white gel pen. They were waaay to small to cut! But I thought it turned out cute and would be nice to go along with a coffee gift card for someone.
The file is HERE!
Thanks So Much! Cherries Card
Here are some quick cards for my card swap that I am in. This month was thank you cards. I used a file from SVGCuts called Shaped Cards and Envelopes SVG Kit. There are lots of cute and easy shaped cards in this kit, make sure to check it out!
I embossed the leaves, added some glitter to the edges, glued on 2 buttons with some twine through the holes and added a little white highlights here and there. The stamp sentiment is from my collection of stamps. It is stamped with black ink on green paper, and used a pink gel pen to color in the circles, then just cut out. Pretty simple!
Subscribe to:
Posts (Atom)